This blog was started as a way to chronicle my love of cooking, decorating and all things homemade and has grown to include my love of all things nut butter. Enjoy recipes with and without our nut butters and all things of our life. We're so glad you're here and part of our BSNB family!
Sunday, January 8, 2012
Carrot Rice Soup with Turkey Breast on Wheat with Red Pepper Aioli
My husband is in love with a panini. Smoked Turkey Panini with Red Pepper Aioli. It is the only thing he orders from Moonlight Cafe, our favorite local eatery and that is due in no small part to the Aioli. He loves it that much. I've tried before to replicate it with so-so results, but I soldiered on and got much closer this evening!
Red Pepper Aioli recipe:
7 oz roasted red peppers
1/2 cup mayo
1 T crushed red pepper
3 t minced garlic, or 3 cloves
Puree everything in the food processor. Easy as can be. Except it wasn't just like Moonlight's. But he liked it. I think I will add some cayenne next time because the crushed red pepper gave hints of heat but I think he's looking for a more all over heat. And I will finally give making my own mayo a try and maybe the pink color of the sauce will be a bit more red. Calling it an aioli without making the mayo is a teensy bit like cheating to me.
So, then I made a wonderful Carrot Rice soup. I loved it so much that I am glad there are leftovers. I know what I'm having for lunch tomorrow!!! Super easy soup.
Carrot Rice Soup recipe
2 cups chopped carrots
2 cups vegetable stock
1/4 cup chopped onion
1 cup brown rice, cooked according to package directions
Pinch of cloves
Pinch black pepper
Boil chopped carrots and onions with spices in stock - I used vegetable but chicken would work also. Once carrots have boiled soft, puree mixture in food processor or with immersion blender. Be careful using large quantities of hot liquids in the food processor and divide into smaller quantities to process if needed.
After pureeing, add rice to carrot mixture and serve.
This was a velvety textured soup but we felt like it was lacking something. I think the next time I make it I will add some brown sugar, and possibly some nutmeg. I think it would add an extra layer of flavor. Also, adding a bit more pepper might round it out nicely.
It was a hearty meal after a busy day spent outdoors. I roasted the turkey the night before and used homemade whole wheat bread for the sandwiches and they looked as good as they tasted. A lot of Sunday dinners for us rely on grazing on leftovers or pb&j; but this was an easy and healthy meal and we'll definitely have it again!
Friday, January 6, 2012
Herbed Goat Cheese Burger on a Homemade Bun
Over the summer, I met one of my best friends, Lisa, at a wonderful little restaurant called Soup'R Natural. We live a distance from each other, and it's always a challenge to find somewhere in the middle. It was a fantastic meal...and we both ordered the same thing, a turkey burger slider accented with goat cheese and basil. It was completely amazing! So, this was how the inspiration for this meal began. How funny is it that when I mentioned this was on the menu for dinner on my Facebook page, Lisa was the one to ask for the recipe. We're too alike!
Then I baked them at 325 for about 20 minutes, watching for overbrowning. Once they were out, I brushed the tops with melted butter and the hubby and I had to split one while they were warm just to taste test them. :) They passed the test. We could hardly wait til dinner time.
I did use store bought onion rings in our meal. Alexia onion rings are the best we've found without deep frying them ourselves. But I did make the dipping sauce, and even taught the girl how! Super easy...about 1/4 cup ketchup, 1/8 cup mayo, 1/8 cup horseradish and then a few shakes of Hot Shot black and red pepper blend, about a tablespoon of italian seasoning and then some paprika. Easy and a great onion ring dip!
Have a wonderful day everyone!
| Looks good enough to eat as is :) |
First, I put about 8 oz of goat cheese into a small bowl and crumbled it up a bit with a fork. I added about 1/4 cup of finely chopped parsley leaves, about a tablespoon each of chives, thyme, mint and then just a taste of chopped garlic. I didn't want that to be the star but I wanted to have that rich flavor hinted at. So I tossed all of that together, salted with a few pinches of sea salt and then started to form little patties. I wanted to create the center for the burger and then freeze it so it would thaw as the burger cooked and not just melt and ooze completely out. Voila!
| Lots of lovely goat cheese patties..I'll admit it, I sampled one! |
I popped the tray in the freezer and gave them a few hours to harden up before making dinner. Once frozen, I formed a 1/4 lb turkey burger around each one and put on the grill. I salted and peppered each burger but that was all the seasoning I added besides the goat cheese. Freezing the goat cheese patty worked so well! The burgers were moist and juicy, but not cheese drenched and that mouthful of the herbed goat cheese was amazing! It could only have been better if Lisa had been there to sample them with me.
| Yum! |
And just so you can see the inside of the burger...
I also made a burger bun to showcase these cheesy beauties...and my Z did not disappoint when it came to making the dough! I took this recipe right from the manual.
Ingredients list:
7/8 cup of water
1 large egg, beaten
3 1/4 cup bread flour
4 T sugar
1 tsp salt
1/4 cup butter
1 1/2 t active dry yeast
Only change made to the recipe was that I omitted 3 T dry milk. I never use that in my breads and I think they're great.
I put all of that in the bread maker on dough cycle. When it finished, I separated it into 18 portions and rolled each into a ball, flattening them a bit, and covering with plastic wrap and a towel to rise the the second rise.
| I added sesame seeds to 1/2 of the batch for a hamburger bun feel. |
Then I baked them at 325 for about 20 minutes, watching for overbrowning. Once they were out, I brushed the tops with melted butter and the hubby and I had to split one while they were warm just to taste test them. :) They passed the test. We could hardly wait til dinner time.
I did use store bought onion rings in our meal. Alexia onion rings are the best we've found without deep frying them ourselves. But I did make the dipping sauce, and even taught the girl how! Super easy...about 1/4 cup ketchup, 1/8 cup mayo, 1/8 cup horseradish and then a few shakes of Hot Shot black and red pepper blend, about a tablespoon of italian seasoning and then some paprika. Easy and a great onion ring dip!
Have a wonderful day everyone!
Thursday, January 5, 2012
Chocolate Cherry Bread - with a guest appearance by Nutella :)
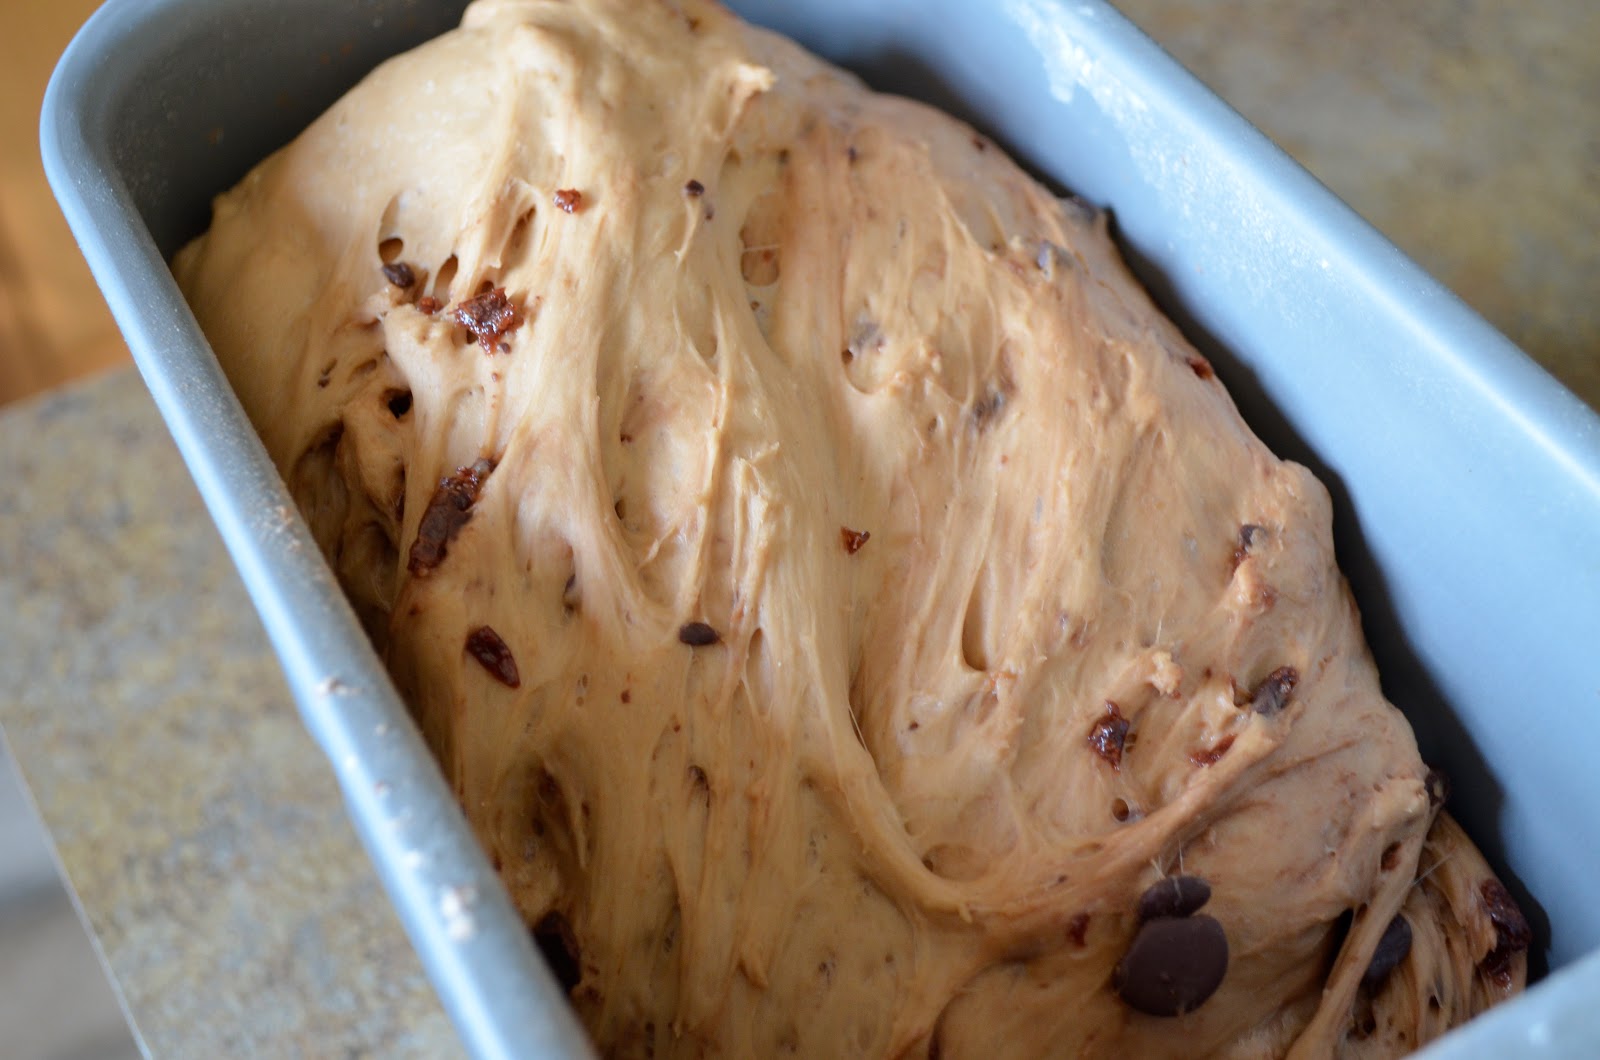
I have been wanting to make this bread so badly since I saw it at Wegman's. I found a recipe to try out with the new bread machine and, while it doesn't look as nice as the one I saw, I think it came out pretty well.
It was a fairly basic recipe, I actually adapted the one from the Z's cookbook/manual that came with it.
1 1/4 cup milk
1 beaten egg
4 T sugar
2 T cocoa
2 t instant yeast
1 1/2 t salt
2 T butter, softened
1/2 cup of dark chocolate, chopped
1/2 cup of dried cherries, chopped
I put everything except the chocolate and cherries in the bread machine and put it on dough cycle. I added the chocolate and cherries in once the first rise was completed and the bread machine did it's second rise.
Preheated the oven to 350, and then formed the dough into a round on a cookie sheet to bake for about 35 minutes. Before the bread even cooled, I had to have a slice...
And then, I thought about it, and what goes better with Cherry Chocolate Bread than Nutella...?
Italian Winter Soup
I made up the name. I'm so bad at naming my creations. I apologize for those of you subjected to my awful naming skills. But this soup was not awful. It was so wonderful, especially since the temps had dipped to a balmy 13 the day I made it. Sure was a welcome dinner after a cold, windy day.
My crock pot is a favorite cold weather cooking appliance. I'm not sure why I don't use it as much in the warm weather but I just don't seem to. But the versatility of it really can't be beat. At my house, we are big fans of Olive Garden soups. Chicken Gnocchi, Zuppa Di Toscana. Love them!! So, this soup was inspired by those soups.
Ingredients:
1 lb ground turkey, browned and seasoned with sea salt and Italian seasoning blend (I used Tastefully Simple)
4 cups of vegetable broth
6 cups of chopped kale & chard blend
1 can Cannelini beans, drained and rinsed
5 large potatoes cut into small cubes
1 clove of minced garlic
Directions, Combine all ingredients in the crock pot and cook until potatoes are tender and greens are wilted.
I don't tend to season the broth because I really heavily season the meat and allow it to seep the flavor into the rest of the soup. It's a personal preference so feel free to adjust.
My crock pot is a favorite cold weather cooking appliance. I'm not sure why I don't use it as much in the warm weather but I just don't seem to. But the versatility of it really can't be beat. At my house, we are big fans of Olive Garden soups. Chicken Gnocchi, Zuppa Di Toscana. Love them!! So, this soup was inspired by those soups.
Ingredients:
1 lb ground turkey, browned and seasoned with sea salt and Italian seasoning blend (I used Tastefully Simple)
4 cups of vegetable broth
6 cups of chopped kale & chard blend
1 can Cannelini beans, drained and rinsed
5 large potatoes cut into small cubes
1 clove of minced garlic
Directions, Combine all ingredients in the crock pot and cook until potatoes are tender and greens are wilted.
| The greens will fill the crockpot at first but they cook down quickly. |
| Soups ready! |
Tuesday, January 3, 2012
Key West Penne with Blackberry Pear Salad
I was a bit skeptical when the hubby read this recipe to me, but he seemed so excited I thought we could at least give it a try. We wanted to make something special for New Year's but we don't go out so I wanted to really go all out with something different and that we'd really like. I am a big time seafood fan so this really hit the spot! I added the Blackberry Pear Salad to really brighten up the meal and it did just that. It was like a taste of summer on a winter holiday!
If you want to read the original recipe, it can be found here. I did make a few changes, nothing earth shattering but just attempts to limit some calories and fat. Don't worry, plenty of both still remain! It really was one of the easiest recipes ever, and I would make it again.
Ingredients:
1 pound box of penne pasta, or any similar type would do
1 pound shrimp, peeled and deveined
1 pound scallops
1 8 oz jar of sun dried tomatoes packed in olive oil, slightly drained then chopped or julienned
1 12 oz jar of marinated artichoke hearts, drained and quartered
1 pint half and half
1 cup grated romano/parmesan blend
Boil pasta according to directions. Cook to al dente, drain.
While pasta is cooking, bring a large skillet to medium high heat and add shrimp, scallops, tomatoes and artichoke hearts. Cook until shrimp turns pink, reduce heat and then add half and half and cheese. Cook through and then toss with pasta.
It's really that simple. I was pretty surprised how easy of a recipe it was, and also was a bit surprised at how wonderful it tasted. Like I said, I was pretty skeptical of the sweetness of the seafood and cream sauce being tossed in with the tomatoes and artichokes. But it worked really well together and was very balanced. Hubby said this had to be added to the "I'll make it again" list so I know he liked it.
Monday, January 2, 2012
Asian Pork over Citrus Slaw
I was so excited when I got a box in the mail from Kikkoman containing Kara-Age Soy-Ginger Seasoned Coating Mix! I love trying new things and it is different from anything else I've made lately, so I started thinking of when to use it. And, then, I had a brilliant thought...New Year's Day. I don't know about you, but around here, we're big on the whole pork n' sauerkraut New Year's tradition. Gotta have it. But pork is pork and cabbage is cabbage...right? Of course, first thing the hubby says..."so, no hot dogs?" Nope. Not a one. Yay me for not having to buy them!
So, I got my list ready and planned it out. I had originally planned to make these as a rolled up in lettuce leave sort of dish but that didn't work out nearly as well as I'd hoped. Oh well, there were great with just the pork and slaw. I think when made again, I might try wrapping them like a spring roll in a rice paper wrapper, or as is. It was a yummy dish. The sour and sweet of the slaw really balanced the heavier fried texture of the pork well.
Ingredients:
1 pound of pork tenderloin cut into small cubes, about 1"
Kikkoman Kara-Age Soy-Ginger Seasoned Coating Mix
2 medium sized oranges, seedless would be easiest to deal with
1/4 cup sesame oil
1/4 cup rice vinegar
1 large carrot shredded
1 head of chinese cabbage, shredded
1 tablespoon of honey
Canola oil for frying the pork
First, I made the slaw and set it aside. Combine the shredded cabbage and carrots in a large bowl. Peel and section one orange and toss the orange, cabbage and carrot together. Into a separate bowl, juice the remaining orange, and add the oil, vinegar and honey. Whisk those ingredients together until really emulsified and then add to the vegetable/fruit mixture. Really toss the slaw with the dressing well and then set aside.
Heat a pan on medium to high heat with about 3/4 to 1" of oil covering the bottom of the pan. Moisten the pork cubes with water, then toss with the coating mix in a large plastic bag. Add the pork to the heated oil and let cook through, turning to get both sides golden brown. Once cooked, remove and let drain on a paper towel.
Place the pork on top of the slaw and enjoy!
I hope you enjoyed our experience of trying out Kikkoman's Kara-Age Soy-Ginger Seasoned Coating Mix! As you can see from the above picture, this was part of the Foodbuzz Tastemaker program.
Sunday, January 1, 2012
Blueberry Layered Stuffed French Toast
I do love baked french toast. It is so nice to wake up, pop the casserole in the oven and have something so delicious ready with no morning effort on my part. I decided to try something a bit different after seeing some fresh from the oven baguettes at the the store yesterday. I likened this recipe to a baked french toast lasagna and it was so good this morning!
The recipe:
Ingredients:
1-2 French Baguettes (I used one and half but I love fresh bread too much to not eat any of it!)
4 eggs
2 teaspoons vanilla extract
3/4 cup of milk (I used skim but it's all your preference)
8 oz softened cream cheese (I used low fat but again, your preference)
1/4 cup granulated sugar.
After slicing the baguettes into rounds, I put them in a large bowl. I mixed together all of the wet ingredients and whisked until they were full incorporated. I poured the mixture over the rounds and used my hands to really mix them up. You could use a spoon but you want to really, really be sure that every piece gets soaked in the egg mixture.
Really, really soak it in!!
Once that is ready, set it aside and mix the cream cheese and sugar together. Set aside to use as the middle layer for the french toast lasagna.
Then, put two layers of baguettes soaked in the egg mixture on the bottom of a greased casserole dish. I then put about 3/4 cup of blueberries scattered over them, another layer of baguettes spread with the softened cream cheese mixture and another 1/2 cup of blueberries. One more layer of baguettes completed the layering.
Put the lid on it, cover it with foil, or whatever else you'd like to use and pop it in the fridge to rest overnight.
In the morning, preheat the oven to 375 and set the casserole out to warm up a bit. Put in the oven for about 45-55 minutes, covering with foil or a lid for the first 30 minutes to not overbrown or dry it out.
Once it's done, let it set for about 5-10 minutes before cutting it.
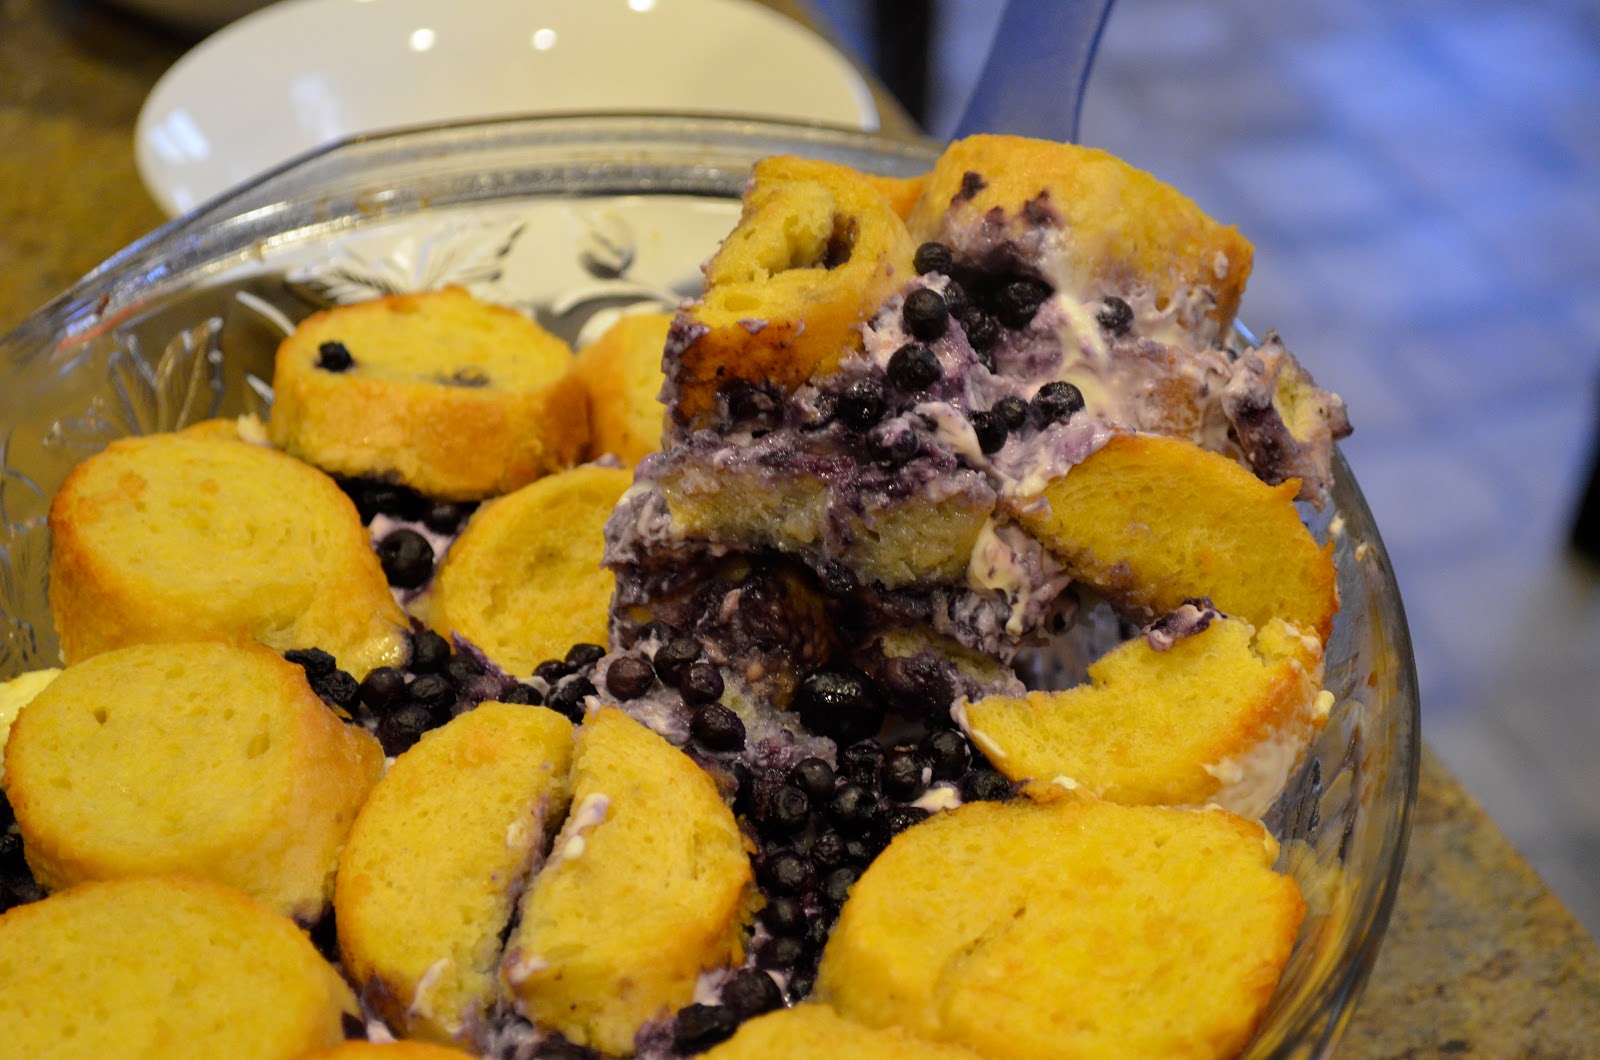
I love the color of the egg coming through, and you can see it's a wonderful blend of cream cheese, blueberries and the wonderful chewiness of the bread.
And, just if you need further proof of how awesome this truly is, I'll leave this final picture for you. A fantastic, super easy, make ahead breakfast. I make this for company that stays over because it lets me enjoy the morning as much as they do.
The recipe:
Ingredients:
1-2 French Baguettes (I used one and half but I love fresh bread too much to not eat any of it!)
4 eggs
2 teaspoons vanilla extract
3/4 cup of milk (I used skim but it's all your preference)
8 oz softened cream cheese (I used low fat but again, your preference)
1/4 cup granulated sugar.
Really, really soak it in!!
Once that is ready, set it aside and mix the cream cheese and sugar together. Set aside to use as the middle layer for the french toast lasagna.
Then, put two layers of baguettes soaked in the egg mixture on the bottom of a greased casserole dish. I then put about 3/4 cup of blueberries scattered over them, another layer of baguettes spread with the softened cream cheese mixture and another 1/2 cup of blueberries. One more layer of baguettes completed the layering.
Put the lid on it, cover it with foil, or whatever else you'd like to use and pop it in the fridge to rest overnight.
In the morning, preheat the oven to 375 and set the casserole out to warm up a bit. Put in the oven for about 45-55 minutes, covering with foil or a lid for the first 30 minutes to not overbrown or dry it out.
Once it's done, let it set for about 5-10 minutes before cutting it.
I love the color of the egg coming through, and you can see it's a wonderful blend of cream cheese, blueberries and the wonderful chewiness of the bread.
And, just if you need further proof of how awesome this truly is, I'll leave this final picture for you. A fantastic, super easy, make ahead breakfast. I make this for company that stays over because it lets me enjoy the morning as much as they do.
Subscribe to:
Posts (Atom)